In 2019, I built a new live streaming PC for Awakening Church. I am excited to share the details of our live studio PC and how you can build your own to have high-quality live production switching and streaming without the typical high cost.
A few months ago we shifted to recording our weekly broadcast in advance using DSLRs, but we’ll soon be returning to a live workflow and we will be using this equipment at the core.
Background
Back in 2016, Awakening Church used a single Blackmagic Pocket Cinema Camera with a Teradek VidiU to stream to our own self-hosted live video server. Times have changed. We now have a multi-camera production with live switching to make it easier to produce live streams.
Before our latest 2019 build, we used a custom computer built in 2017. This computer worked well but each camera required a lot of cables: power, SDI, and VISCA in/out. This made cabling heavy and cumbersome to setup. Additionally, the PC was in a standard case, which means we had to setup all cabling from scratch every week.
This computer was stolen in late 2019. We thankfully had insurance which covered the cost of building a replacement.
Awakening has been and still is a mobile church which needs to setup and teardown every week. When building the replacement, we kept setup and teardown issues in mind.
Requirements
- Entire system easy to assemble and store
- Operation by a single volunteer — this means remotely controlled cameras
- Save money over commercial systems costing $8K+
- Reduce cable needs
Our 2019 build
We used Vimeo Premium and its bundled Livestream Studio switcher for video production, so the entire computer is built to run this program.
The software requires hardware acceleration for best performance, so we chose a processor with an integrated GPU which supports Intel Quick Sync video to offload some H.264 encoding and decoding tasks.
We adopted NDI|HX cameras which can handle power, network control, and H.264 video all in a single Ethernet cable.
We no longer need a capture card for every camera, but we still need one for capturing ProPresenter slides.
We use a rackmount design to allow the computer to remain in a portable rack alongside a PoE switch and PDU. This lets us easily setup and teardown the system every week.
Here’s a picture of the portable PC rack:
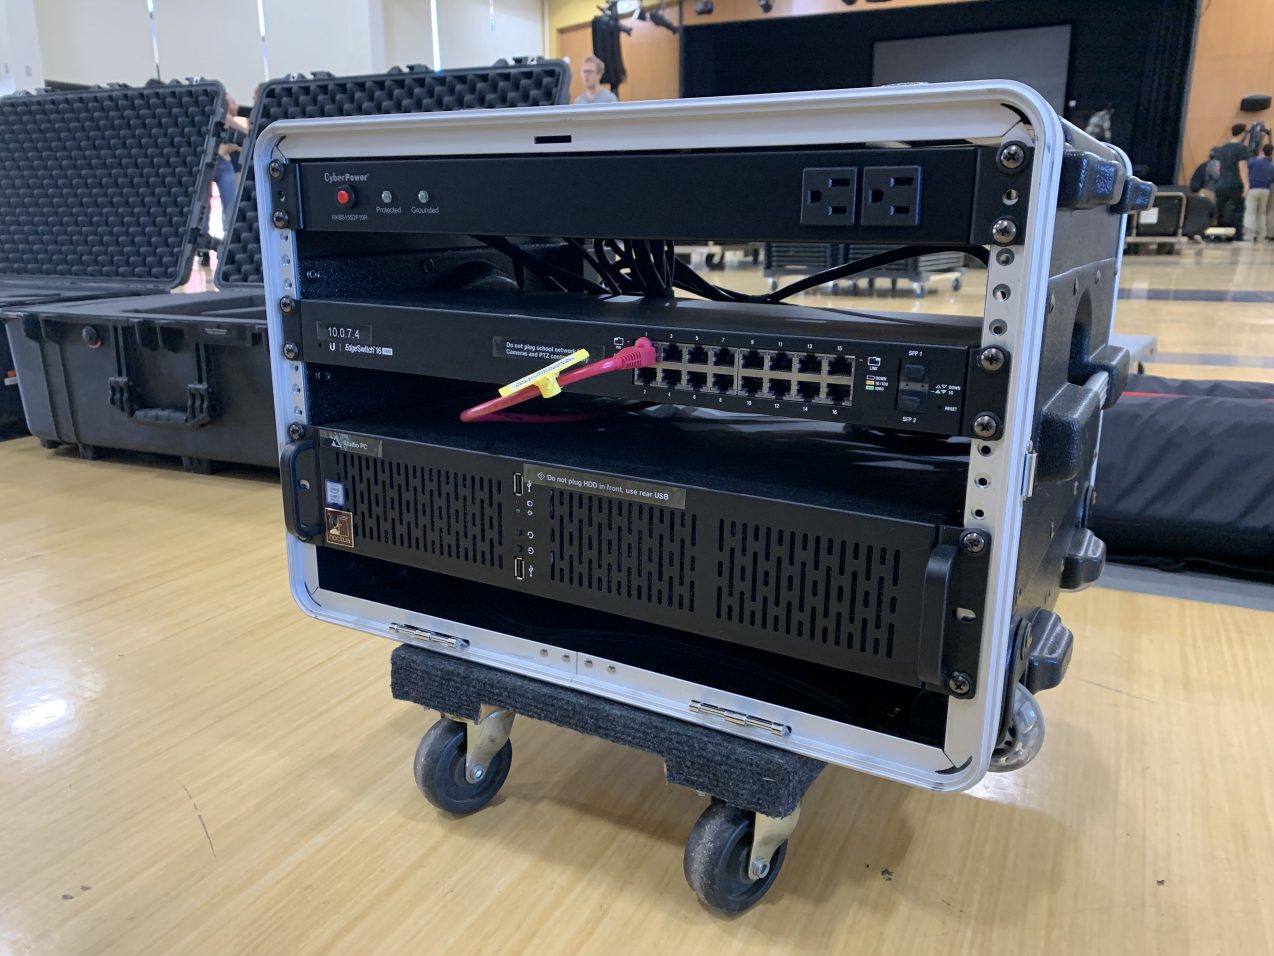
The EdgeSwitch is for the camera network. The switch provides power to the cameras and a PTZ controller which makes it easy to move the cameras. You could also just use the PTZ controls within Livestream Studio to save more on costs.
Here’s the part list, including the switch, PDU, and Gator rack:
We already had a donated 150W EdgeSwitch, so the cost isn’t included in the above list.
Here’s the interior:
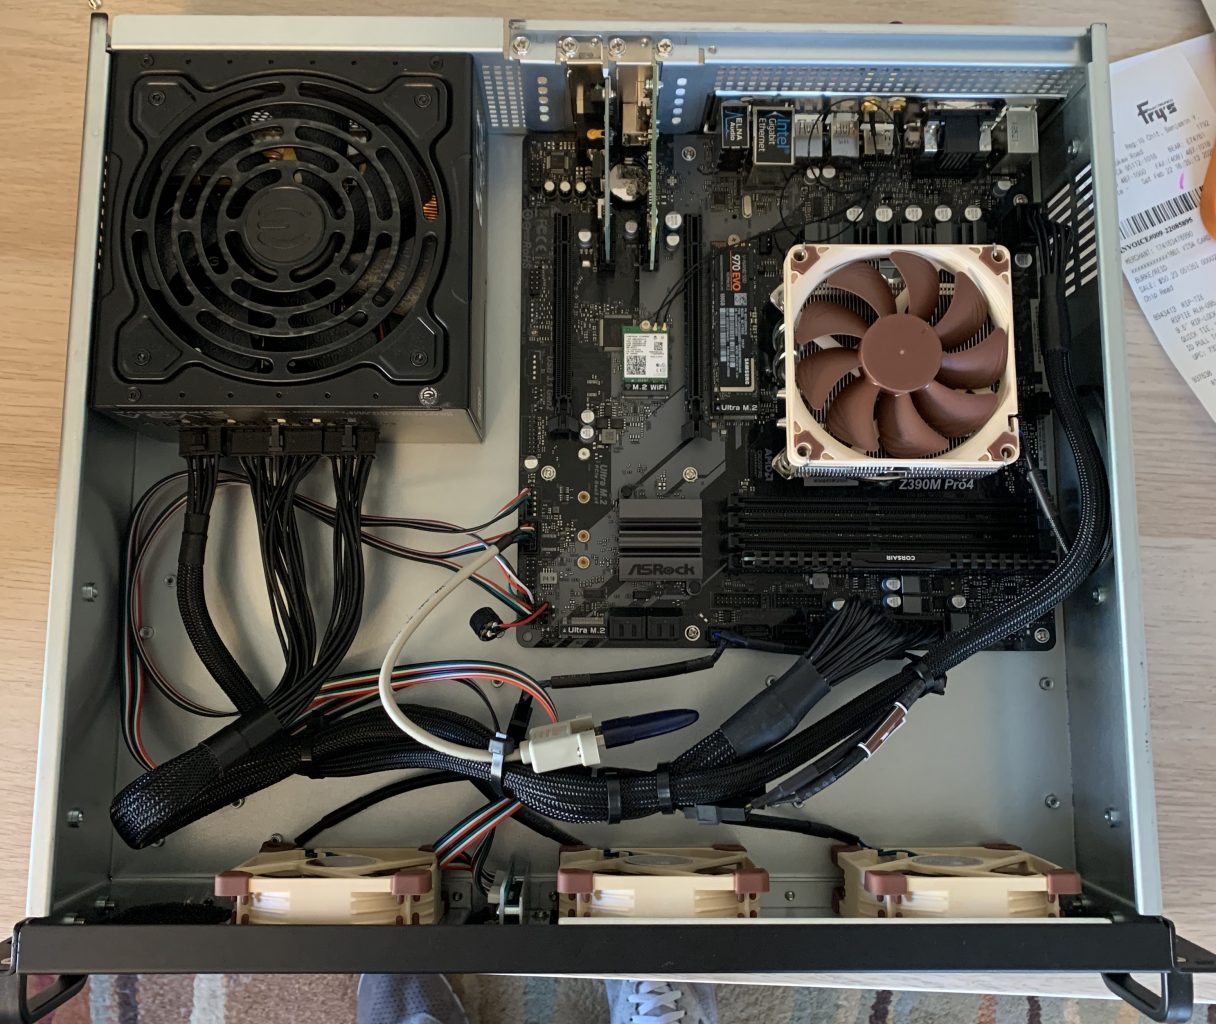
Recent additions in the above photo not included in the part list are an internal hardware license USB dongle and onboard Wi-Fi. And yes, that’s a Fry’s receipt for Rip-Ties. So long, Fry’s.
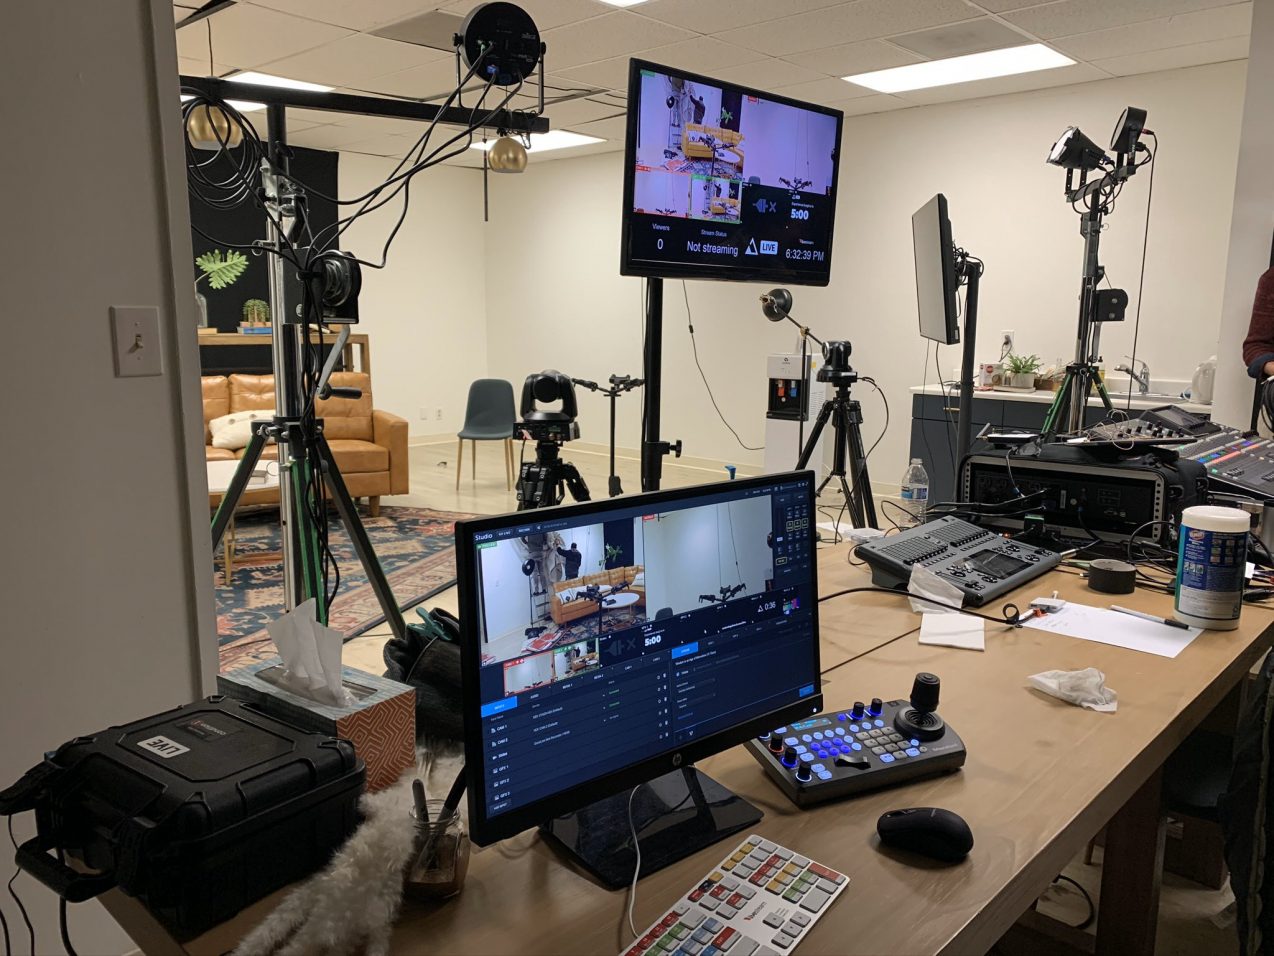
Studio
In March 2020 we setup this equipment semi-permanently in our church’s studio. Here’s a photo of the early setup. We now have large 4K monitors instead of a single small one, but this small monitor worked well for easy storage in a Pelican 1650 case.
Performance
This system performs well for a fraction of the cost of typical commercial live streaming systems. The Intel i7-9700 includes an integrated GPU with Intel Quick Sync video which hardware accelerates H.264 encoding and decoding in Livestream Studio.
However, this setup did not perform well when adding a third camera.
After adding a third NDI|HX camera, we’re starting to hit the limits of performance of this system when also used with a computer HDMI input which requires conversion.
My friend Douglas suspected thermal issues with the CPU, so we looked into that as well, but the real issue appeared to be the need for a dedicated GPU to keep the CPU workload down.
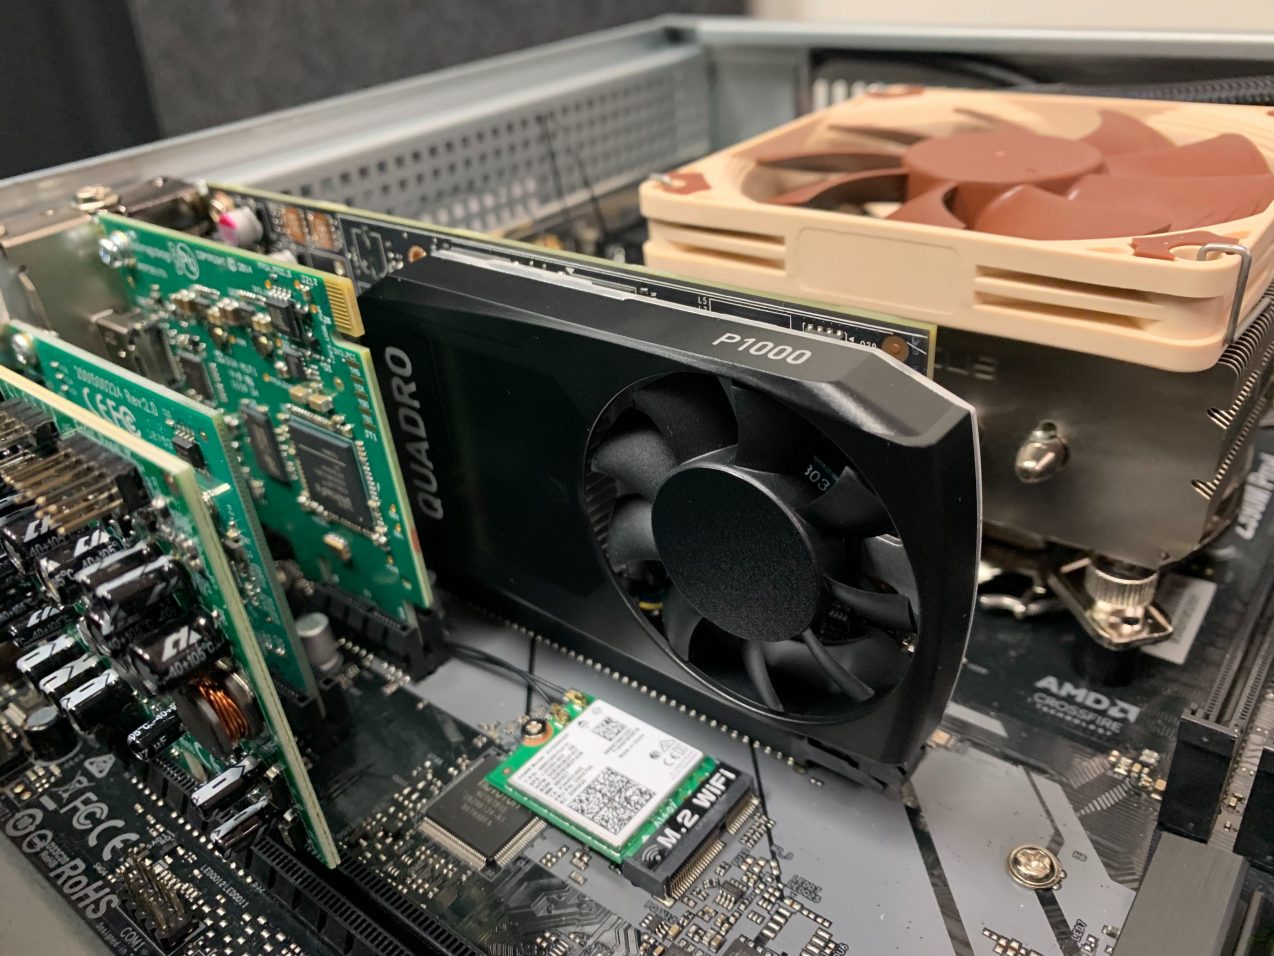
Adding a GPU
We added a Quadro P1000 graphics card from B&H after running into performance issues. Livestream Studio appears to work much better with this card in place. Our previous CPU usage was very high — often over 85% during recording and streaming. We’re now back down to about 50% according to the operator who ran cameras today.
This added $317.99 to the cost of the above build.
I’d bet you could save some money and get a Quadro P400 to do the same job. It’s the same card used in Livestream’s own high-end HD51 4K edition which costs $8,999. (See Livestream product datasheet.) The P400 card is only $118.74 from B&H.
The integrated GPU is disabled in firmware by default because we added a dedicated GPU. I was curious if running both the iGPU and Quadro would be beneficial, but I didn’t bother turning it back on after the tests went well.
If your build is not constrained to low-profile cards due to a 2U rackmount design, you have a lot more options for hardware encoding and decoding with NVIDIA than the Quadro series, but this card does quite well and includes a regular-sized bracket for use in traditional PC cases. Since the P400 contains the same hardware H.264 decoding and encoding engines and stream limits as the P1000, consider the P400 before needing to add on more cost with a more expensive card.
Summary
The rackmount setup in a portable case is ideal for setup and teardown. Using NDI|HX takes more compute resources but really reduces the amount of cabling. And the machine is very easy to build with commonly available parts.
We are preparing to use this equipment again for live streaming in an outdoor setting under a tent. In the future, I look forward to sharing what we learn from adapting this equipment to our new environment.